Connecting Your Shopify Store to SyncMyOrders
This guide walks you through creating a private Shopify app for your store and entering its credentials into SyncMyOrders.The whole process takes about 5 minutes.
Connecting Your Shopify Store to SyncMyOrders
This guide walks you through creating a private Shopify app for your store and entering its credentials into SyncMyOrders. The whole process takes about 5 minutes.
What you’ll need
- Access to your Shopify Admin (store owner or staff with App development permissions)
- Your SyncMyOrders account open in another tab
Step 1: Open the Shopify Dev Dashboard
- Log in to your Shopify Admin (e.g.
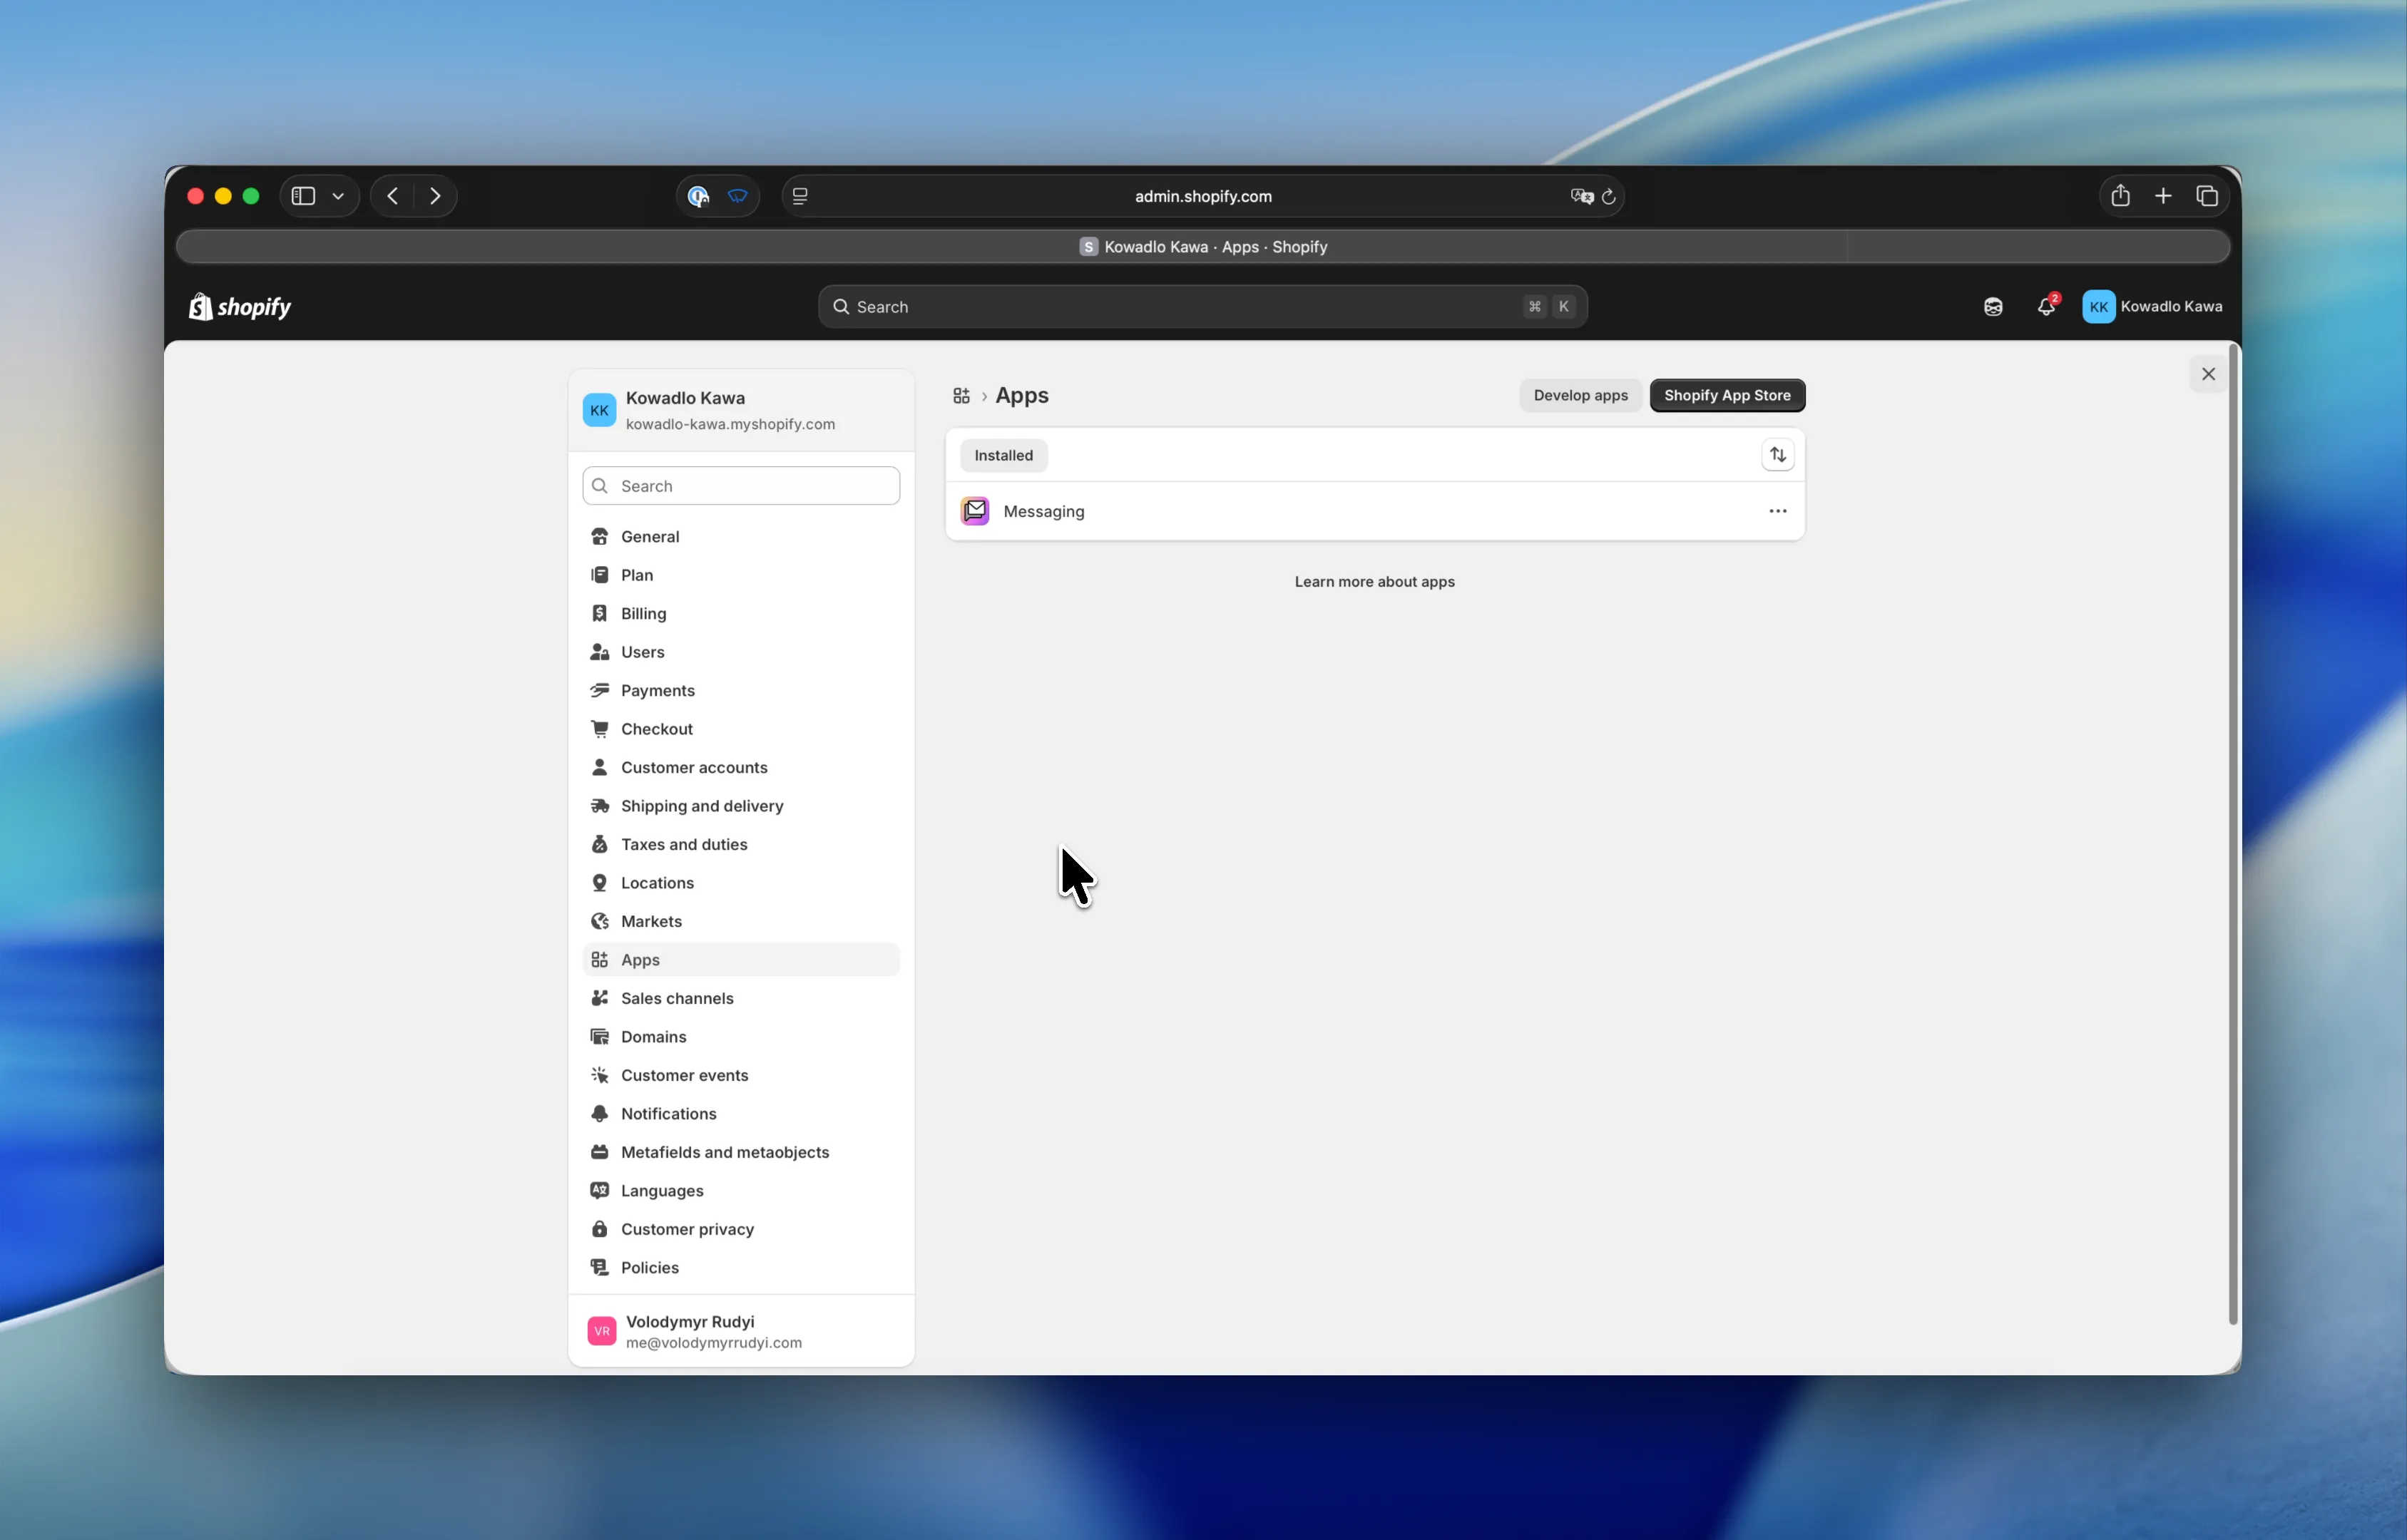
https://your-store.myshopify.com/admin) - Click Settings in the bottom-left corner
- Click Apps and sales channels
- Click Develop apps
- Click Build apps in Dev Dashboard
If you see a warning about enabling custom app development, click Allow custom app development to proceed.
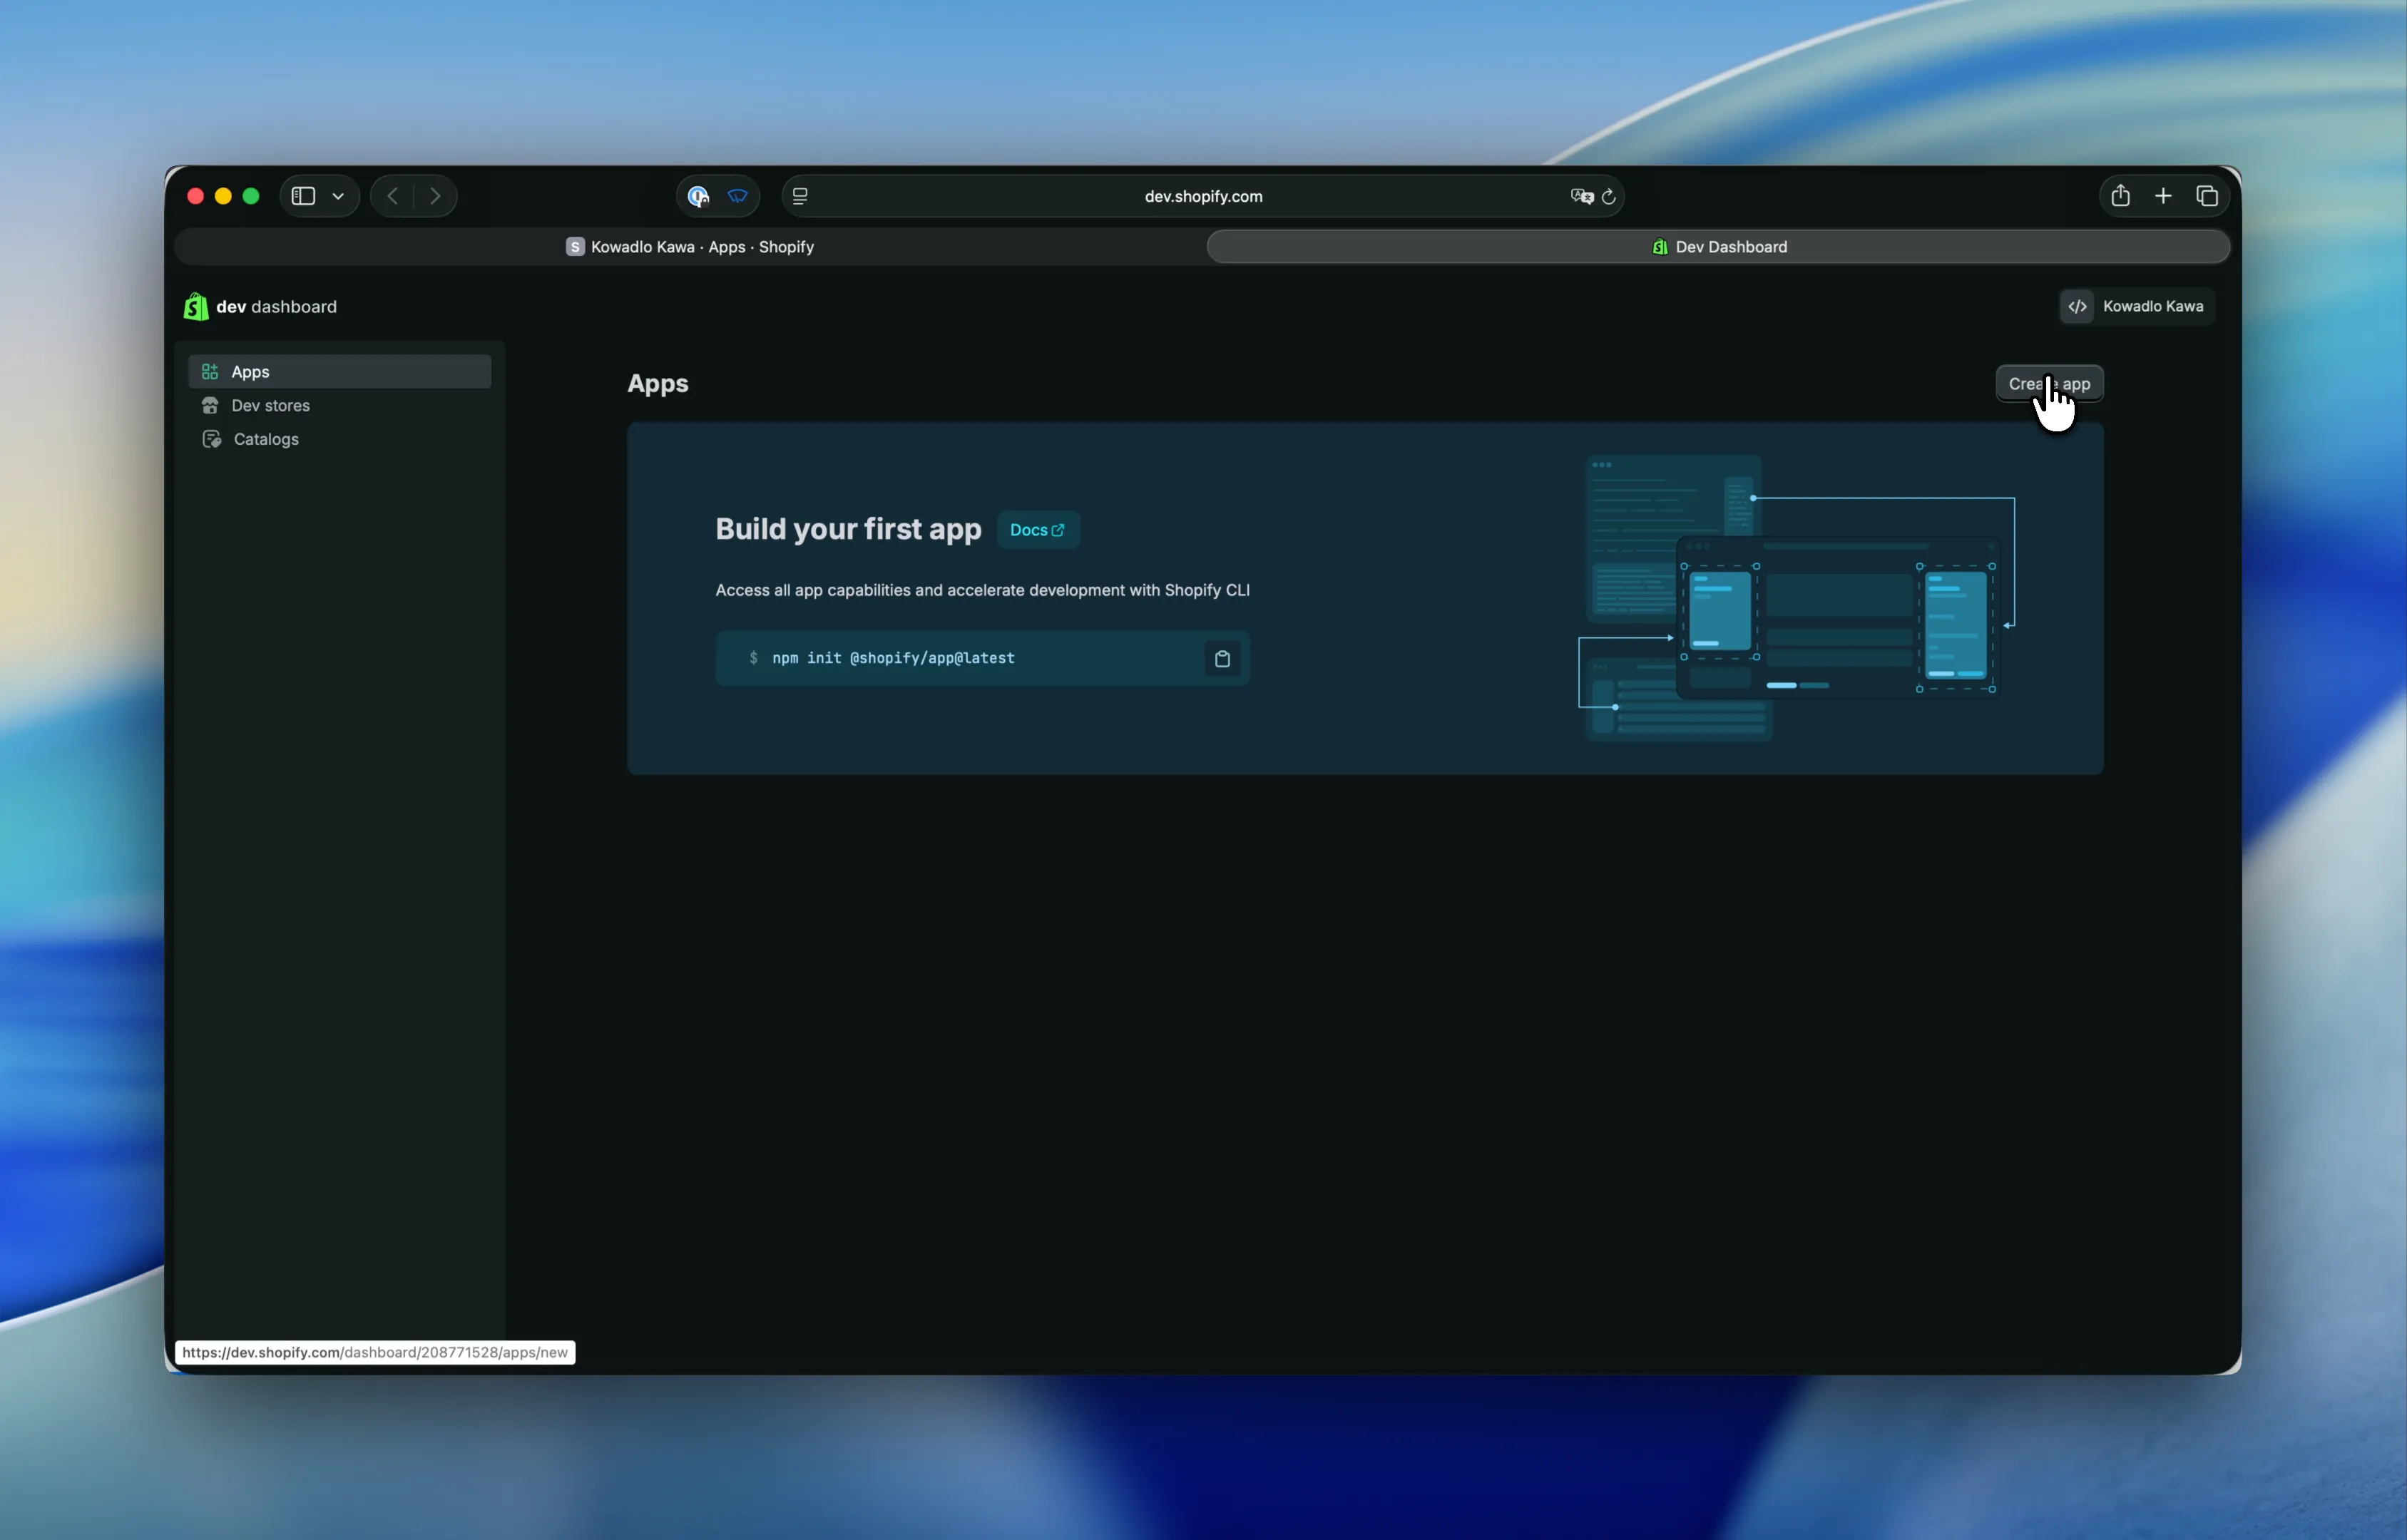
Step 2: Create a new app
- In the Dev Dashboard, click Create app
- Enter the following:
- App name:
SyncMyOrders Integration - App URL:
https://app.syncmyorders.com
- App name:
- Click Create
Step 3: Configure API scopes
Your app needs permission to read and write specific data in your store.
- In your new app, click Configuration (or Create version)
- Scroll to the Admin API integration section
- Click Edit next to Access scopes
- Enable scopes required for your needs. Granting extra permissions is not necessary and not recommended.
- Uncheck “Embed app in Shopify admin”
- Click Save

Step 4: Release the app version
- Scroll to the top of the page and click Release version (or Save and release)
- Confirm by clicking Release
Step 5: Install the app on your store
- In the right sidebar, click Install
- Select your store from the list
- Click Install app
- Review the permissions and click Install
 The app is now installed on your store.
Step 6: Copy your credentials
- In the left sidebar, click Settings
- You will see:
- Client ID — a long alphanumeric string
- Client secret — click Reveal to show it
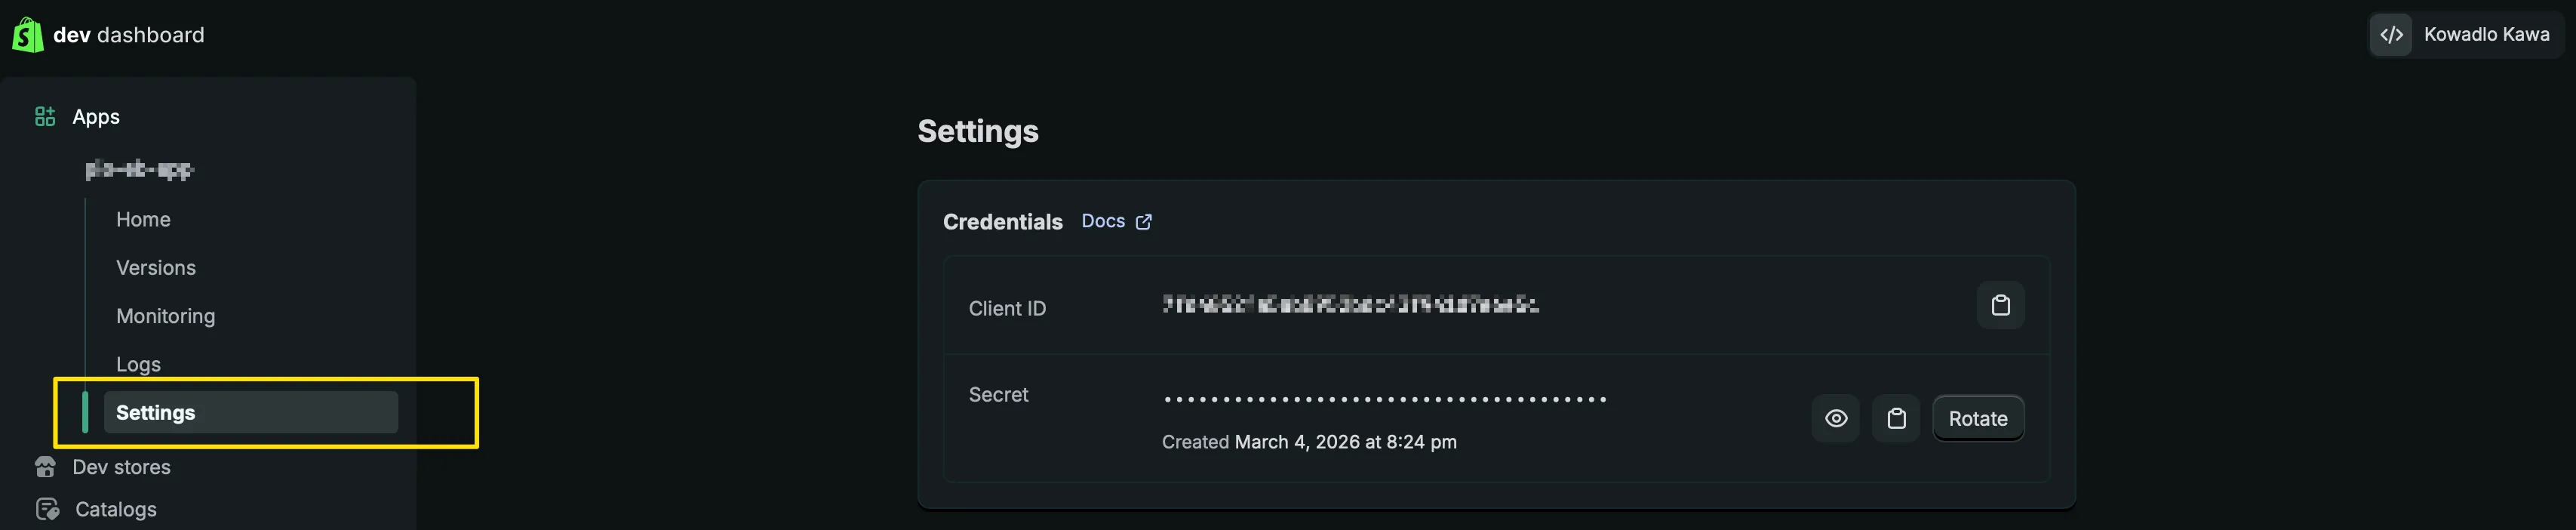 Copy both values. You will need them in the next step.
Keep these credentials safe. Treat them like a password. Do not share them via email or messaging apps — use your SyncMyOrders settings page only.
Step 7: Enter credentials in SyncMyOrders
- Go to your SyncMyOrders account
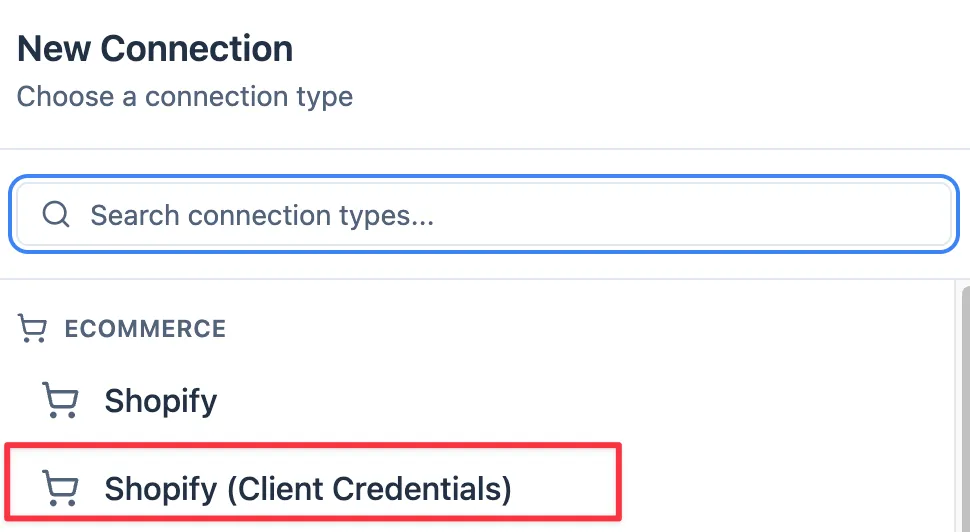
- Navigate to Connections → New connection
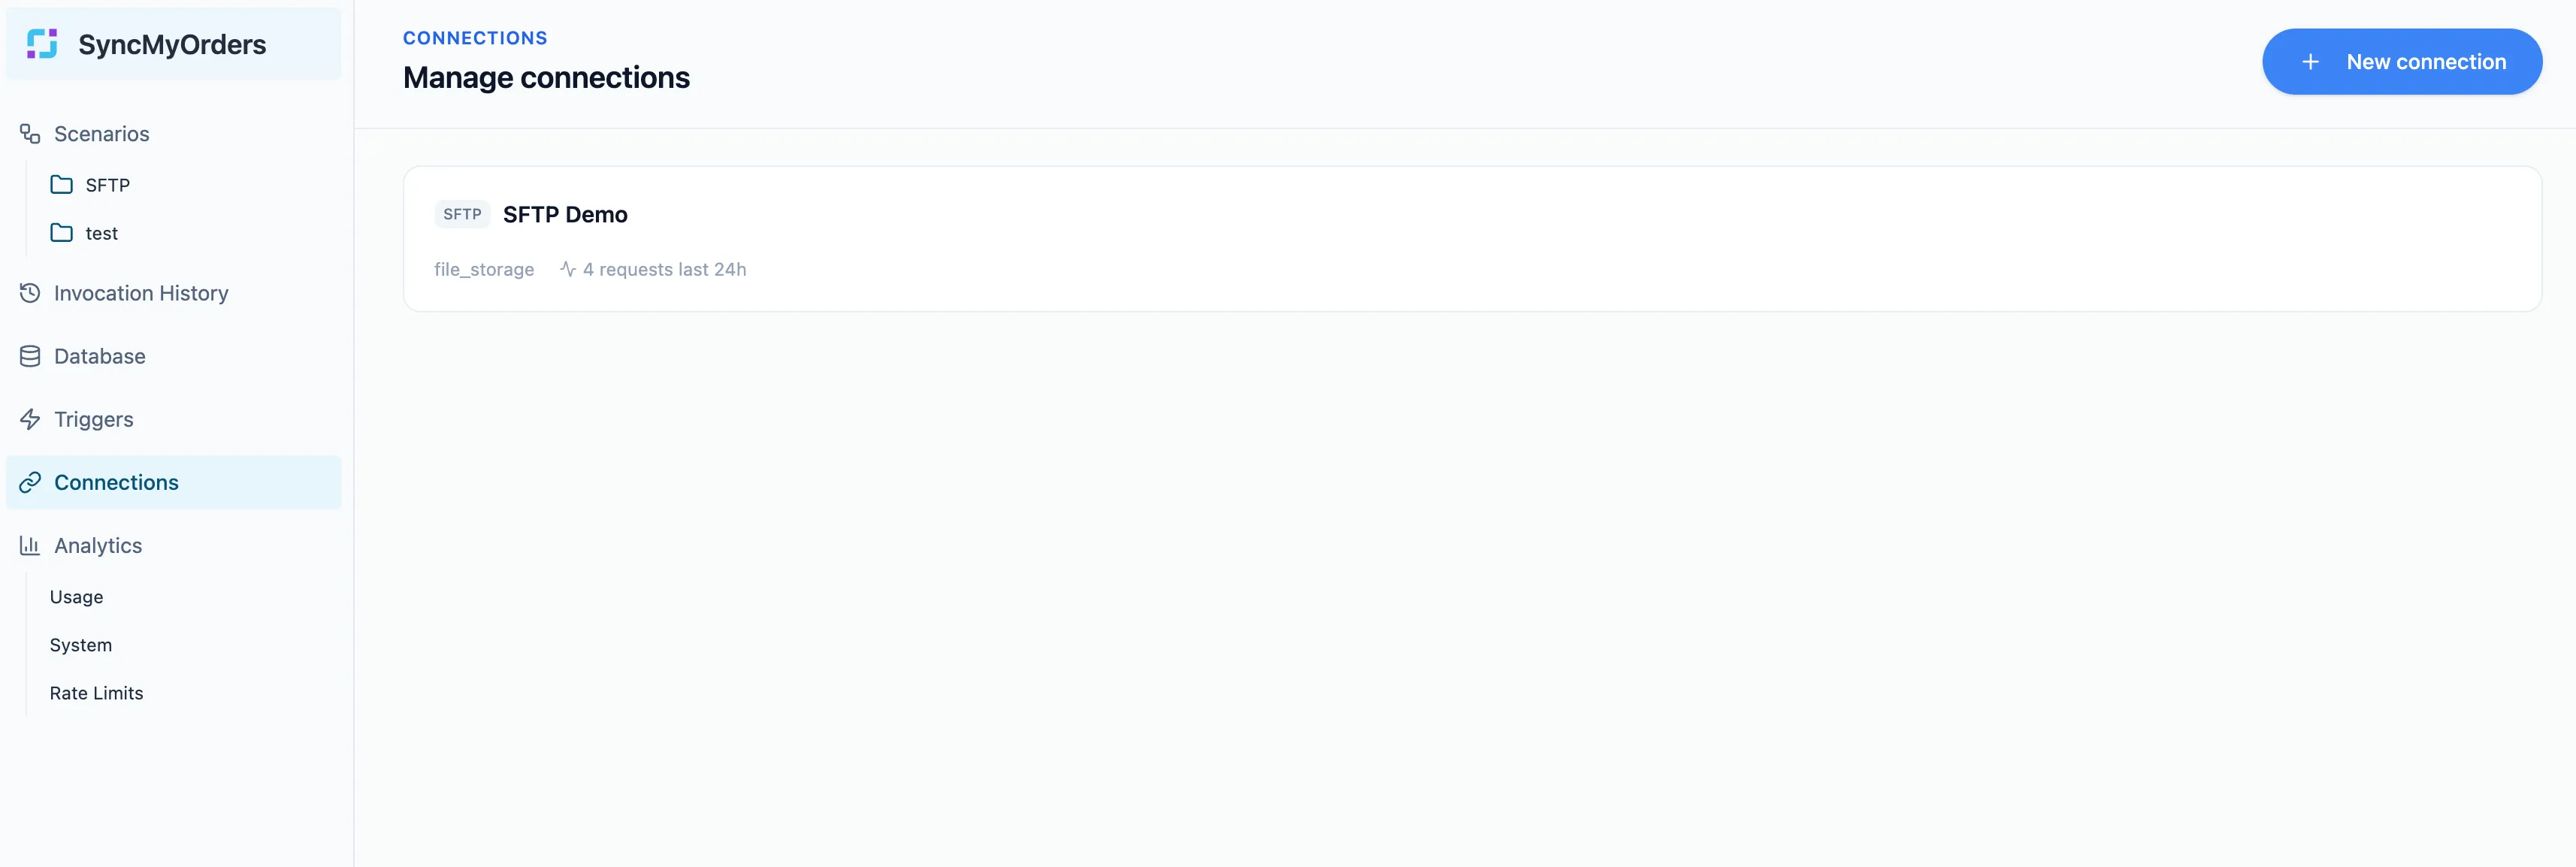
- Select “Shopify (Client Credentials)” as a connection type
- Enter:
- Store URL: your store URL (e.g.
your-store.myshopify.com) - Client ID: paste from Step 6
- Client Secret: paste from Step 6
- Store URL: your store URL (e.g.
- Activate scopes you specified for your custom application in the previous step.
- Click Create
 SyncMyOrders will verify the connection. You should see a green confirmation within a few seconds.
Troubleshooting
“Connection failed” error
- Double-check that you copied the Client ID and Secret without extra spaces
- Make sure you clicked Release version in Step 4 before installing
- Make sure the app is installed on the correct store (Step 5)
“Missing scopes” warning in SyncMyOrders
- Go back to your app in the Dev Dashboard
- Check that all scopes from Step 3 are enabled
- Release a new version and reinstall the app
Can’t find “Develop apps” in Settings
- You may not have the required permissions. Ask your store owner to grant you the App development → Develop permission, or complete the setup as the store owner.
Need help?
Contact SyncMyOrders support at [email protected] and include your store URL. Do not include your Client Secret in support emails.